Showing posts with label Try-It-Tuesday. Show all posts

Tuesday, 3 June 2014

Try-it-Tuesday: Strawberry and Apple Juicing!

I don't know what it is about juicing, but it has kind of freaked me out ever since I wanted to try it. Maybe it's because most recipes I found told me to go get roots and extracts that I had never heard about. Hard. Pass.

Or, maybe it's because the machine itself is a beast. And not in the cute way that Maleficent says it. It actually has so many pieces, and I don't know what goes in where, and what comes out of where. Anyway, it freaked me out. You can see how gigantic it is below.

But then the other day, I was reading one of my favourite books called "Who Will Cry When You Die?" and it said to try juicing. It's also #47 on my summer bucket list, so I figured I'd give it a try, seeing as it was my day off.

We have a juicer at home, but I hadn't ever used it, mostly because I forgot it was there (and the above reasons). But I dug it out, blew some dust off and got to work.


Let me just say that it looks way more intimidating than it is! It's seriously the easiest thing ever, and takes roughly 30 seconds, minus cleaning time (which is only a few minutes). I just made a simple apple and strawberry juice, like Robin Sharma suggested in the book.

(Don't mind the post-workout sweatiness....)

It was delicious! All I did was core and cut up an apple and take the ends off of about 7-9 strawberries. Drop the into the juicer and the juice starts coming! It's great! Or maybe I'm just weirdly excited. 

Make sure that you put your glass under the spout before you start juicing though ;) ANNNND, it tastes a million times better if you put some ice in the glass and mix it around so it gets cooler. 


So there you have it! Now you should all go out and try juicing! It's so cool! And of course, delicious. 

Happy Juicing!!

love,

Lo

Tuesday, 20 May 2014

DIY Spoon Ring!

Hello folks!

The other night I embarked on an adventure of sorts. Now before there's too much suspense, I'll just tell you! ;) I made spoon rings!! (Duh by the title, hahah).

My one friend Jenna loves this Craft Show that comes to town, and a few years ago she bought these awesome spoon rings! I loved them! Then a while later I started to see them pop up all over Pinterest with DIY's. I pinned it roughly two years ago and never did it. Classic.

Anyway, Saturday night rolls around and I'm looking for something to do...other than watch movies online...because as great as that is, I feel lazy after a while - no it's just great. Moving forward....I decided to change up my regular routine of watching TV and decided to do something useful with my time. It's about time! So here is le tutorial:


So, it's pretty simple. Just measure your finger with a piece of paper and then cut that fancy spoon/fork. You can cut the edges in a bit too if you like. Luckily I have a lovely father who used his bandsaw (or something) to cut it for me, but you really only need a small metal cutter. 

Now's the potentially hard part. If you decide not to read all the instructions on the blog then it will probably be harder...not from personal experience or anything....

MAKE SURE YOU USE A SOFT METAL!! I feel like they should have specified this more on the blog, so I'm capitalizing it now so it's not missed. If you decide to use a hard stainless steel, it will bend about as easily as a 95 year-old Luddite. For your sanity, use a soft spoon. You can easily tell by how difficult it is to bend with your hand at first. 

Next, grab some pliers (or two) to hold and bend the spoon into a nice circle. This may take some time, so be a little patient. Or in my case, get a strong man to com help you if the struggle is real. Make sure it's a good fit to your finger and adjust if necessary.

Then all you have to do is use some sand paper on it and scrub-a-dub-dub until it's soft. The pliers might have made a few marks on your lovely ring (but that just gives it character), so nows the time to sand those away.

Here's how mine turned out!!


See my papa working so hard! He's a good one. :)

And there you have it! Spoon rings are awesome! Go make one! Just make sure to follow my advice above.

Ciao!

Lo

Tuesday, 15 April 2014

Mexican Stuffed Bell Peppers

I feel like I've been on some Mexican kick lately. Last week I made a healthy Crunch Wrap Supreme and now this week I'm making Mexican Stuffed Bell Peppers. What can I say, the Mexicans have great flavour!

Anyway, this recipe is relatively easy. I kind of worked off of this recipe from LaurenConrad.com, but altered it a lot.


You need:

1/2 can pre-cooked canned chicken
1 tbsp Taco Seasoning
1 Bell Pepper
1 cup Spinach, stems removed
1 Tomato, chopped
1/2 cup quinoa, already cooked
1 slice Light Havarti Cheese (other cheeses will work just as well)
2 Eggs, over-easy


Directions:

Step 1: If you haven't already cooked quinoa, do so now. It should take roughly 20 min, allowing time to cool. Once it is cooked, pre-heat the oven to 350 F. Cut bell pepper in half and remove seeds.

Step 2: Place drained, canned chicken into pan and sprinkle taco seasoning on top. Heat the pan to medium/medium-high and mix the chicken and seasoning together for 2 minutes.

Step 3: Take chicken out of pan and cover to keep warm. Add spinach and tomato to pan and sauté them for 3 minutes, or until spinach wilts. *I didn't even use any oil here, because it didn't seem necessary with the juice from the tomatoes. Then add quinoa to mixture, allowing it to heat up. 

Step 4: Mix chicken with tomato, spinach, and quinoa mixture. Add half a slice of cheese to each bell pepper. Then add the mixture above, and stuff the inside of each pepper half. 

Step 5: Place the peppers onto a baking sheet, with a non-stick mat, and cook for 15 minutes.

Step 6: When you have about 4 minutes left on the timer, start cooking your eggs, as you like them. Once the timer goes off, place the eggs on top of your peppers and serve. Enjoy!

If you have any questions, let me know! Did you try it? Let me know what you think! I'd love to hear!

Thanks for reading my lovely friends!! Have a great day!


xoxo,

Lo

Wednesday, 9 April 2014

Try-It-Tuesday: Healthy Crunch Wrap Supreme!

So I realize that today is not actually Tuesday, but these things happen, right? I'd like to think that I was sooo busy with my super exciting and eventful life, but actually yesterday I just went to school, did some laundry, did some church stuff, hung out with an old friend, and "studied" (as in a tried...and got distracted by Pinterest....classic). Anyway, clearly I need some more self-control. Although not having dessert for 6 months definitely takes some of that...so I don't feel too bad. I plan on studying a lot today though, and not that I've written that for all the internet world to see, I have to!


So today I was looking on Pinterest for some hip flexor stretches (more on that later, because my mind is BLOWN!) and my stomach started growling, when I remembered this amazing recipe I tried about a year ago. It's a DIY Crunch Wrap Supreme.
The one from Taco Bell actually isn't that bad calorically speaking. It comes in at a whopping 540 calories, with 7g of saturated fat, "0g" trans fats, 1210mg sodium, 71g carbs, 6g sugar, and 16g protein. So yeah, it's tasty, but is it worth it when you can make your own healthier version at home!? Of course not you guys!! 

The recipe that I found called for sour cream, flour tortillas, taco seasoning (which actually isn't all that good for you), and ground beef. Ground beef is not bad (although the more lean, the better), but I had some shredded chicken that I figured would take less time to make, and would be healthier. Win-win!

My tweaked version of this uses healthier subsitutes so you can feel better about your choices...how cliche does that sound?? But for real. You'll be healthier and probably can have 2 if you really wanted, without the effects on nasty chemicals and such! :) 

So, this is what you need:

(2 Servings)

2 large tortillas*
1/2 can shredded cooked chicken
4 tsp taco seasoning (homemade is wayy better for you!)
2 dollops Non-fat plain Greek Yogurt
1/4-1/2 cup shredded cheese
shredded Lettuce
diced Tomatoes


* I would've preferred a whole wheat tortilla, but my mom just bought these spinach pesto ones that are about 140 cals/serving, so I figured I could use it too.

**If you want more of a crunch, the other recipe calls for tortilla chips. I opted out, but if you find organic or gluten free ones, those would be a healthy substitute! They have some great ones at Costco!


Step 1: Add chicken to skillet with taco seasoning, just to heat and mix. Cook on medium for about 2 minutes, stirring regularly.


Step 2: Assemble all ingredients! This representation was a classic case of "Lauren's eyes are bigger than her stomach", but that just means leftovers, which is a win in my books.


Step 3: Put the tortilla in the microwave for 10 seconds to heat it enough that it will bend easy. Lay the tortilla out, and place shredded chicken, cheese, a dollop of greek yogurt, and top with tomatoes and lettuce. If you want to add the chips, add them after the cheese and chicken.


Step 4: Fold as the photo above shows, folding one edge up towards the centre and repeating in a clockwise or counterclockwise direction. Fold so that there is no hole in the middle. The original recipe says that if there is though (like the first time I made it), add a piece of tortilla to the centre.


Step 5: Pour grapseed or olive oil in a pan and cook on each side for 3 minutes on medium-low.


Step 6: Enjoy! It's SUPER delicious!!


love, 

Lo


Wednesday, 2 April 2014

Try-It-Tuesday: Zumba!!

Soo if we're friends on Facebook, you probably saw that I did something a little crazy on Tuesday night. Not only me, but a bunch of girls (and some guys - props!) got together and did some 80's themed Zumba together! My really good friend Sherri is a Zumba instructor and so she gave us a free lesson! She's really a gem. And you should check out her blog! She's seriously one of the coolest people I've ever met.


Have you ever tried Zumba? Either way, you should go and do it now! It's so much fun and seriously a great workout! Also here's a tip for any future 80's themed Zumba activities - leg warmers are called that for a reason - they are HOT. Also, wear a loose shirt. And maybe bring a towel ;)

Jane Fonda anyone?

So, what exactly is Zumba? According to the oh-so-trusty Wikipedia, it's "a dance fitness program created by a Columbian dancer." It's basically dancing with aerobics. It incorporates hip-hop, soca, samba, salsa (who knew there were so many?), merengue, mambo, and martial arts. "Squats and lunges are also included." Yeah....definitely felt that. It's a good burn! ;)

SO, now that you all know what it is, GO TRY IT!! You can go to a class at your local fitness studio or gym, or even do a video from YouTube. Here's a gooder! 

Go have fun dancing AND working out at the same time! 

Love, 

Lo

Wednesday, 26 March 2014

Try-It-Tuesday: No Dessert for 6 Months

Call me crazy. I kind of feel that way. I have grown up loving and enjoying chocolate. Maybe a little too much! It's hard to control when my Dad has a large chocolate stash he always updates. And I know exactly where it is.

Sometimes on Pinterest I'll see something about cutting sugar out of your diet (which is actually a bad idea - your body needs sugar! Just make sure it's the right kind), and I've always been like, yeahhh, okay, that's a joke. I never would have thought that I could be the person to stop eating sweets or cut out bad sugar from their diet, but.....

I've decided to do an experiment of sorts. On Sunday, after coming home from our grandparents house, my brother and I were talking about all the dessert we eat. It's so tasty, and really hard to resist when you have a mom who bakes like a madwoman (in a good way!). She makes the tastiest food. Don't even get me started on her Death By Chocolate. But anyway.... he and I are really trying to get fit, especially lately, so we decided to challenge ourselves and limit our dessert intake. And when I say limit, I mean completely get rid of it from our diet.


I know, it's that shocking. 

So yes. We are crazy. But so far so good! I haven't had dessert since Sunday (we started on Monday), which to you may seem like nbd, but trust me, that's a BIG deal for me! I usually have some kind of treat every day, wether it's chocolate, some kind of baked good, and mostly chocolate again. Let me just say, that having treats IS NOT A BAD THING! I repeat, treats AREN'T a bad thing. I just want to see if I can go without them for a while. I'm making sure that I nourish my body with the necessary nutrients and such, so that I don't feel like I'm depriving myself. 

So when I say "no dessert", what does that mean exactly?

It means: no chocolate, no candy, no pudding, no cinnamon buns, cake, cookies, pastries, or other baked goods (I'm still deciding on muffins - obviously not all muffins are good for you). Although my brother and I decided that we can have dark chocolate. So, I plan on having fruit and dark chocolate to satisfy my sweet tooth while doing this challenge. I have a seriously great recipe for banana ice cream that's totally guilt free and I would 100% allow myself to eat it while doing this. Also, when it comes to dark chocolate, I've never really been a huge fan. That's why I made sure to have good quality chocolate, that's a little over 50% cocoa. I'm sure I could get used to darker chocolate but I don't really want to, because I love the sweet taste of it!


So far, I've found this to be true! I haven't even craved chocolate since starting. Let's hope it continues!

Exceptions include: weddings, birthdays, and the like. I mean special occasions class for a little indulgence! Still not sure on vacations, but I'll update you once I figure it out. 

So, now that I've publicly broadcasted this, I have to stay accountable! I'll keep you updated on my progress too. I don't recommend this for everyone! You have to be careful so you don't deprive yourself so much that you start binging. Sadly I've done that before, on a small scale, but I realized the importance of treating your body well, ie giving it proper nutrients. It's extremely important to give your body what it wants (even if it's a treat), but I'm trying to do it in a healthier way (ie. fruit and dark chocolate). I just want to be less dependant on it for a pick-me-up. So guys, wish me luck!!!


xoxo,

Lo

Tuesday, 11 March 2014

Tasty Taco Soup! A Fiesta in your Mouth

The weather is warming up, which means that there's only a few weeks left for warm soups and chilli! So here's a great recipe that is perfect for a cold day (or really any other time). I came by this recipe from a girl at church. I was in charge of putting together a large dinner for people last Thursday night, and I met with a few people who came up with a bunch of great ideas, but we ended up doing Taco Soup because it's in a crock pot - i.e. it's super easy (especially since we had to feed ~100 people)!

It turned out great! It was super tasty and we got plenty of compliments on the meal. Shout out to all those seriously amazing people who came through and helped me make it (especially my brother Chris)! There is no way that I could have done this by myself! Although, this recipe does make a lot, but based on my pictures, I'd say you could go easy on some of the ingredients. I have a large crock pot, and it got filled to the brim!

Here's what you'll need:


1 lb Ground Beef (extra lean preferably)
1 large Onion, chopped
2 packs of Taco Seasoning
2 cans diced Tomatoes
1 jar of Salsa
2 cans Corn
2 cans Black Beans
1 can Kidney Beans
1 can Brown Beans (optional)


-The recipe is super easy, it just requires a little bit of prep. You'll just need to brown the beef and cook the onions. 

Step 1: Chop up the onion into small pieces. I personally chopped it up large and then threw it into the food processor in 2 intervals.


Random side note: while I was cutting the onion up and my eyes were burning, I genuinely started to wonder who was the person who thought, "Hey! This plant is making my eyes water and burn. This is great, I should totally eat it!" - I can't be the only one who's wondered. Moving on...

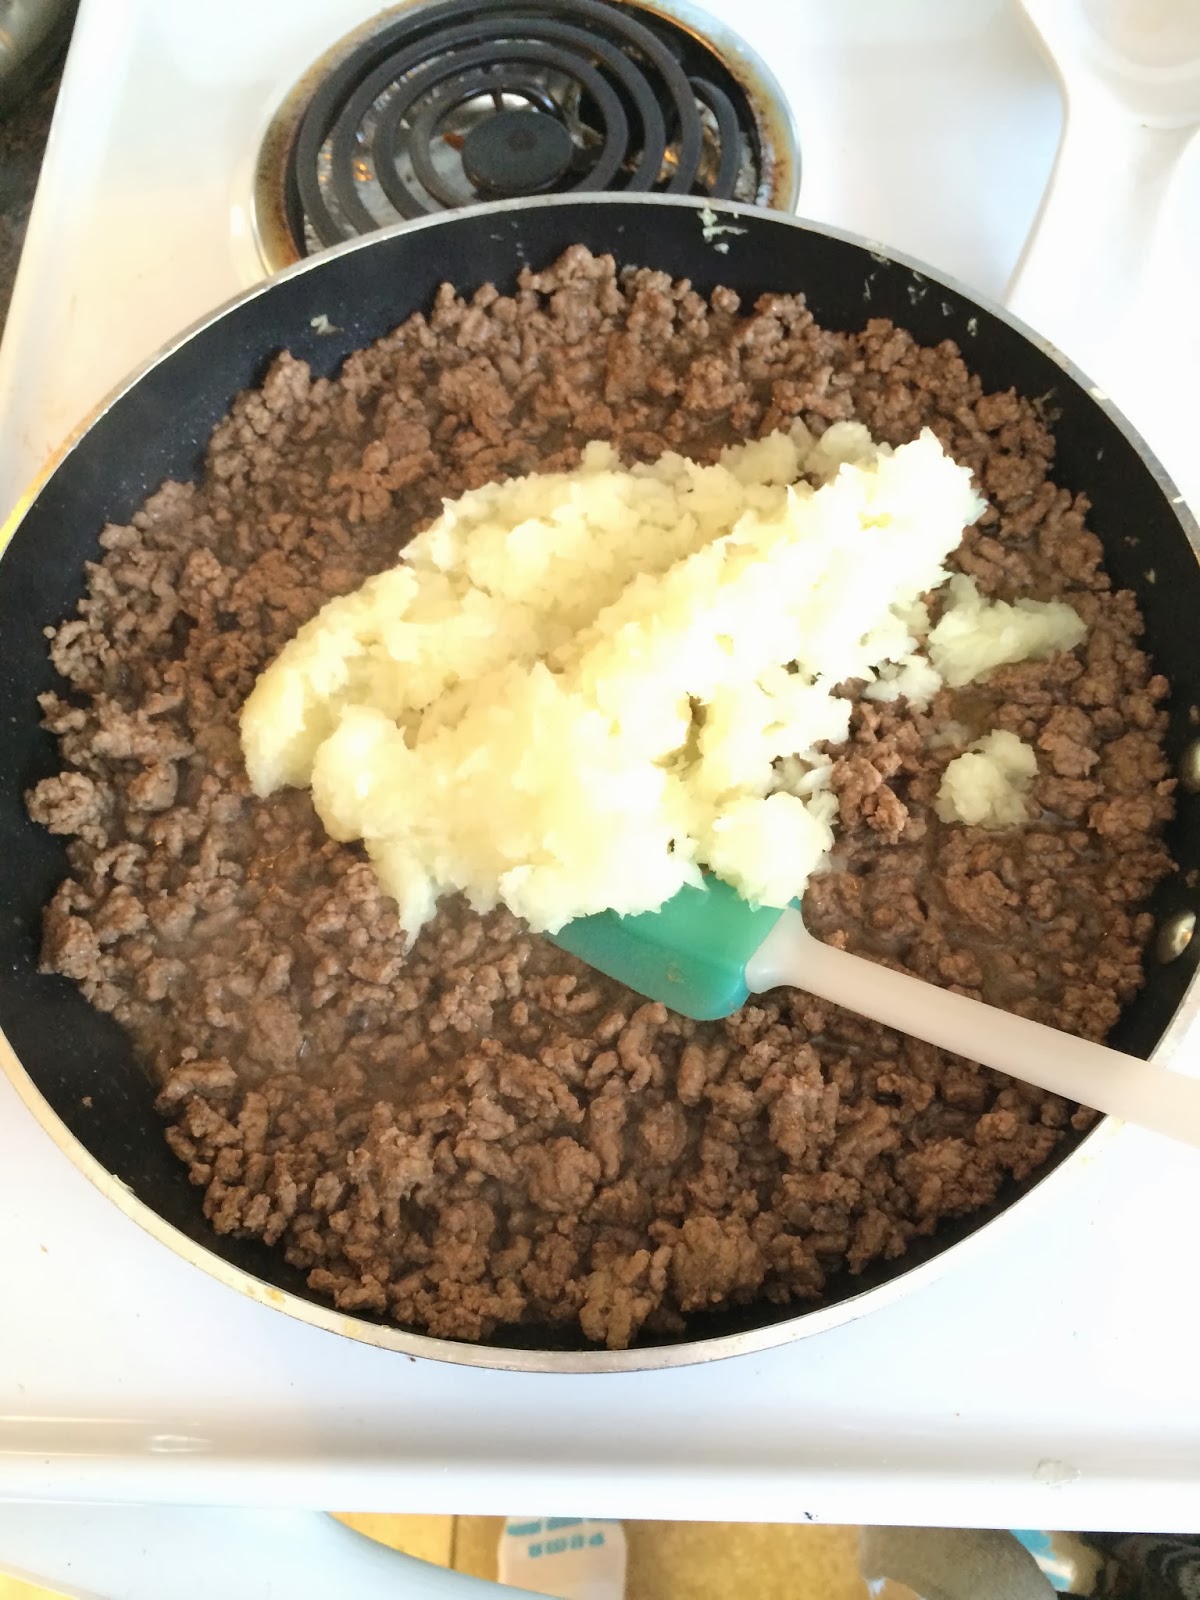
Step 2: Brown the ground beef on medium heat, mixing regularly. Add both packets of taco seasoning to meat. Then add the onions to the mixture and cook until translucent.


Step 3: Open all cans and place into the crockpot. Pour meat and onion mixture into pot also. Add water if needed for some liquid/if you have room, haha.


SEE! Look how freaking full it got!! And then I remembered I forgot to add the salsa...


So yeah, there was a lot of food.

Step 4: Set crockpot on high for 4-6 hours, and wait until done! Serve with sour cream (or greek yogurt), shredded cheese, and taco chips. This recipe also goes nicely with a garden salad.


Hope you enjoy this recipe! Let me know if you try it!! 

xoxo,

Lo

Tuesday, 4 March 2014

Herbed Garlic Shrimp!

So the other day I tried something that slightly freaked me out. It was totally irrational, I know. But still. It was weird. At least at first. Black shrimp. Am I the only one who thinks shrimp should just be pink? Maybe it's just what I'm used to.


Either way, I found this really tasty new recipe for shrimp. I got super excited to make it and then I looked in my freezer and all I could find was this black tiger shrimp. It looked questionable to me. But obviously it's sold in stores for a reason. So without much luck in finding regular shrimp, my hunger pains told me that I needed to suck it up and try it. 

I'm happy to report that it's not weird!! It tastes the same as regular pink shrimp. In fact, it actually turns pink once you cook it. Bonus. 

This recipe is super savoury and has a perfect blend of subtle flavours to make it suitable for pretty much any side dish. I planned on making sweet brussel sprouts, but didn't have time. That's a story for another day. 


Soo here is the slightly adapted recipe from the lovely ladies at Tone It Up! It turned out great you guys! Serves 4.

1 1/2 lbs shrimp*
4 tbsp grapeseed oil
2 cloves of garlic, minced
1-1/5 tsp dried rosemary
3/4 tsp dried thyme
1/4 cup white wine**
salt and pepper to taste

* I'm pretty sure I didn't have that much in the above picture...whoops. It still worked out fine. 
**I didn't have white wine, so I used white wine vinegar and diluted it with water. I ended up doing 2/3 of the measuring cup vinegar and 1/3 water. 

1. Pre-heat oven to 400F. Whisk together oil, garlic, rosemary, and thyme in a pan over medium heat for about 3 minutes. 


2. Add mixture to a baking dish, toss shrimp in, and evenly coat with herbed oil. 


3. Add salt, pepper, and white wine (vinegar) to the dish.


4. Bake for 8-10 minutes or until shrimp are pink. Be careful to watch, because shrimp can easily overcook! (Not from personal experience or anything....).

5. Serve over fresh greens or veggies and drizzle the remaining sauce on top! 

This was after I ate a few. SUPER tasty guys! (Ignore that they may or may not be slightly overcooked, it was still delicious)

Enjoy! And make lots, because they will go fast! ;)


xoxo,

Lo

Tuesday, 25 February 2014

How To Cure A Burnt Tongue!

Happy Tuesday!

Hope you are all doing well! Today I have an unlikely item on the agenda. Most times on Try-It-Tuesday, I would do a recipe or potentially a craft, but today I am testing out a home remedy. Sadly this weekend I developed a cold at the same time that I burnt my tongue trying to sooth my throat due to the cold.

Life: 1 Lauren: 0
Rookie mistake. I was just so excited to eat some of that chicken noodle soup that I took a big spoonful and slurped it on up. Then felt the intense burn and spit it right back out. It didn't help that I was FaceTiming at the same time. Sorry Ashley for the lovely picture!

I was hoping that the burn would go away when I woke up the next morning, especially since I sucked on about 3 ice cubes. But sadly, it was still there. Although, less painful at least! So, I went on trusty Google to find some home remedies.


I got things like sugar (although it only temporarily soothes it), honey, anesthetic ointment, gurgling salt water (the thought of which makes me want to gag), cough drops, mouth wash, cloves (not sure if they meant the spice or garlic?), Advil, ice cream, raw potato, coconut, and even the genius idea of "not drinking/eating hot foods while waiting for it to heal". Thanks to captain obvious for the last one.


But maybe I was a little stubborn, and I didn't want to wait for my tongue to just heal on it's own, The tricky thing is that I'm not only trying to cure (not just sooth) my burnt tongue, but also not aggravate my cold. That kind of rules out anything dairy sadly. I was really leaning towards yogurt, because I read that it's medically the best thing for a burnt tongue. So I immediately took an Advil after breakfast and set out to find what actually worked!

I figured Advil would immediately help with the pain, mouthwash would also help with the cold, and cough drops were a two-birds-with-one-stone kind of remedy.

I noticed quickly that the Advil lessened the pain, although did not completely alleviate it. The only thing mouthwash did was give me fresh breath - but I guess I can't complain about that.

While I was looking through my medicine cabinets, I remembered this spray that I used a few years back when I had a wicked sore throat. And I found it!! I figured that if it could numb my throat, it could numb my tongue. And numb my tongue it did! Sweet, sweet relief. I could still feel the burn, but only if I pressed my tongue to the roof of my mouth - and even then, it was very minimal. It took about 5 minuted for the full effect to kick in, but it was glorious soothing. I found that you have to reapply it after a few hours, but that may be just because it had a best before date of 2010....(I swear I didn't have it that long ago!)...anyway, it still works! Just make sure to get an anesthetic oral spray of some sort.

Look! I tried out photoshop for the first time and made this cute handy-dandy guide for you!


And if for some reason, the above don't work well enough (they should if you actually use it before the best-before date), it's a good excuse to eat ice cream for a whole day. ;) No judgement coming from me! 


Happy Tuesday friends, and may you never have to deal with a burnt tongue!

Love,

Lo

Tuesday, 11 February 2014

The 30 Day Challenge

I see this all the time on Instagram and Pinterest. The 30 Day Challenge. It can be for planks, not eating sugar, squats (I might follow a few fitness people on Instagram...), or even photo challenges.

PS. She has some even more awesome ideas on her blog!


The thought of doing 100 burpees right now is nauseating. But, how amazing would it be to say you can do 100 burpees?! You could totally do it in 30 days!


I love this idea, because you only have to commit to something for 30 days. That sounds easy! You can do almost anything for 30 days. Plus, you never know if something will stick, since you're already in the routine of it.

If you do something that's small, it's easier to keep up with it. Do something that doesn't suck up a huge amount of your time. So I wouldn't particularly suggest that you read one book a day, while at the same time running 20km. Unless you have an endless supply of time and are super ambitious. In which case, message me, and I'll feature you on my blog. JK. I don't think that's very healthy. Is it? Do people run 20K a day? Please shed some light on this current situation. I digress.

Anyway! You could develop any talent that you've been meaning to! Now's as good of a time as ever!


You guys know I love TED talks. So, watch this YouTube video that inspired my post! Let me know what you think!


What are you gonna do for 30 days? What's something you've always wanted to do? GO DO IT! Comment below and let me know!

Love you guys!

Lo

Tuesday, 4 February 2014

A Little Change...

Hello my friends!

I hope that you've been enjoying my blog so far! It's already been 3 months since I started! Crazzy! I sincerely appreciate all your support! I writing this blog. I really have loved sharing health tips, trying new things, and laughing at internet pranks (seriously, some people are flippen hilarious!). I feel like so much has happened since my first post!


I've been doing some thinking lately though. As much as I love posting each day, I've had a hard time giving meaningful content lately. Maybe it's because I was feeling super ambitious in November. Or maybe it's because I didn't have a job, or a full course load. Either way I don't feel that I'm giving you lovely people all that I can when I have other things on my plate, such as school, church, work, social life, etc...SO, I've decided to make a little change to the way things are run around here. I hope you'll still stay with me! I've decided to narrow down how much I post each week.


I know it's important in blogging to be consistent with your posts. So from now on, every week will look like this:


Tuesday: Try-It-Tuesday

Wednesday: My Favourite Five

Friday: Fit Friday


That's not to say that I'll never make a travel post ever again, or share the talents of various pranksters around the world (because that would just be sad) - but it will be less often. I also hope to travel more, that way when I DO make posts, they'll have my heart and soul in them. I'll show you personal tips and experiences.


So my lovely friends, I hope you keep reading along! You mean the world to me! Love you all! 


xoxo,

Lo
 
{ Blog design by Tasnim }